
Time to share a new DIY project, a beautiful Shabby Chic wooden easel made from scratch, (another) one of my all time favorites. I loved this project right from the beginning and I'm sure you'll love it too, because you can easily integrate it into your home or office as a decorative stand, use it at your wedding for display or just about everywhere else, there are millions of possibilities. I also have a surprise for you, a beautiful Shabby French graphic, I'll tell you more in a bit.
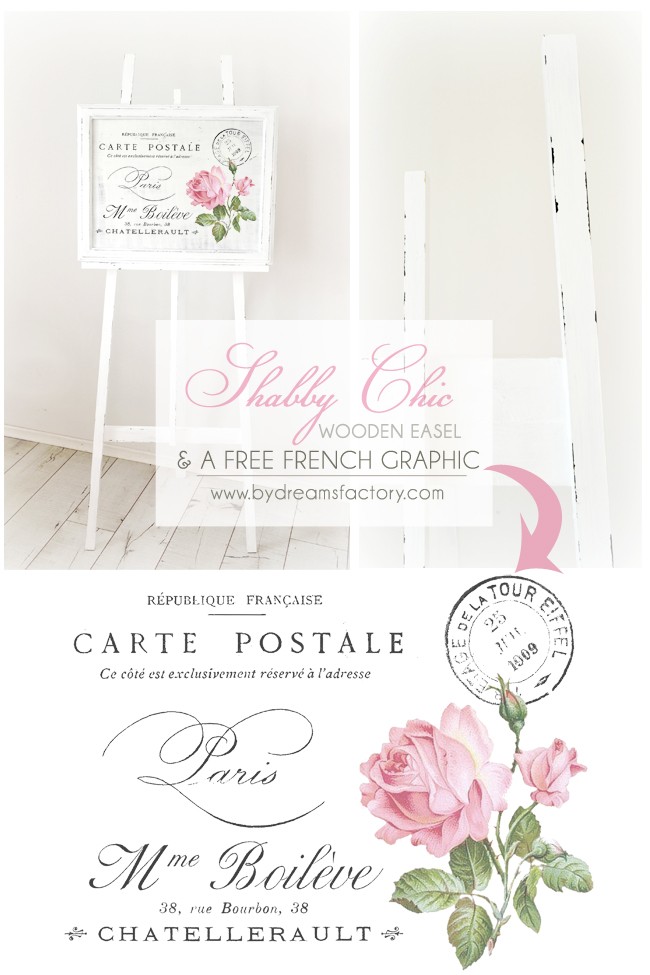
Of course you can use it as an artist easel as well, what better time to put your canvas on, bring your brushes, paints and start using your imagination and play with different colors! :) The truth is, this is what I wanted to do when I saw the easel beautifully painted in white and distressed. And it fit perfectly my white home decor! Even though it was custom made for one of our clients, I loved it so much I almost kept it for myself. :)

Mr Dreamy made the design, cut all the wood using a Makita Jigsaw* and assembled it and I did all the painting & distressing part. We wanted to make something easy to assemble so this wooden easel consists of a front framework and a flexible back leg.
I just love when we have a project like this that gives us the possibility to work together as a team. We kind of contradict at first because we each believe have better ideas, and of course we agree to disagree... But we somehow end up with the best solution covered in a compromise (and a kiss) and everything is great again in our dreamy factory :)
I just love when we have a project like this that gives us the possibility to work together as a team. We kind of contradict at first because we each believe have better ideas, and of course we agree to disagree... But we somehow end up with the best solution covered in a compromise (and a kiss) and everything is great again in our dreamy factory :)
How to make a Shabby Chic wooden easel
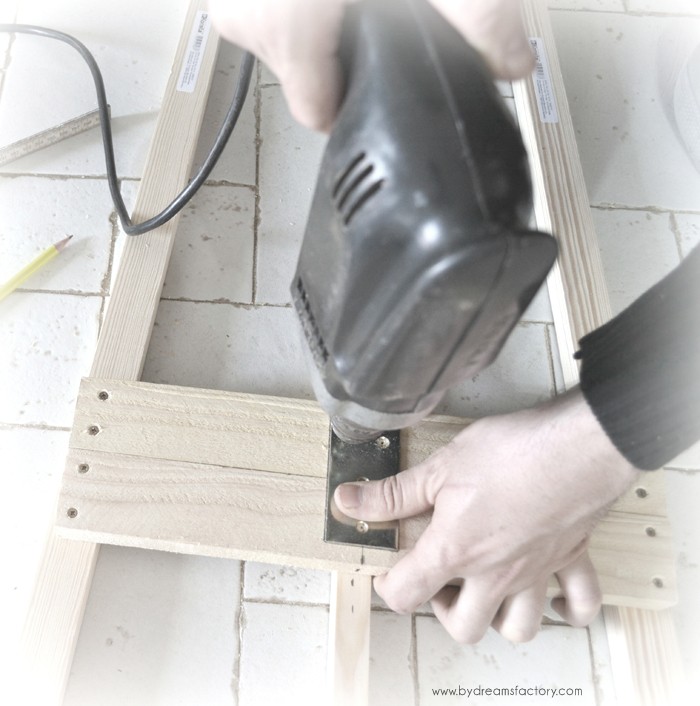
First cut and assemble all the front pieces (the two vertical legs and the horizontal pieces).

Then use a stainless steel butt hinge to attach the flexible back leg to the top front horizontal pieces of wood. Easy peasy! :)
Here are the approximate sizes of the wood pieces (I forgot to exactly measure them). We didn't wanted the easel to occupy too much space, if you want to make it wider, you can play with the angles of the vertical front legs. If you do that, all the horizontal sizes will change, just make sure you measure first and cut second! :) You could put the vertical front legs on the floor, to see exactly how they look and measure the horizontal wood pieces depending on the opening of the angles you choose.
[ctt title="Learn how to easily make your own Shabby Chic wooden easel" tweet="Learn how to easily make your own Shabby Chic wooden easel via http://ctt.ec/DfL7z+ @didreamsfactory" coverup="DfL7z"]

How to paint with two contrasting colors and create a Shabby Chic finish
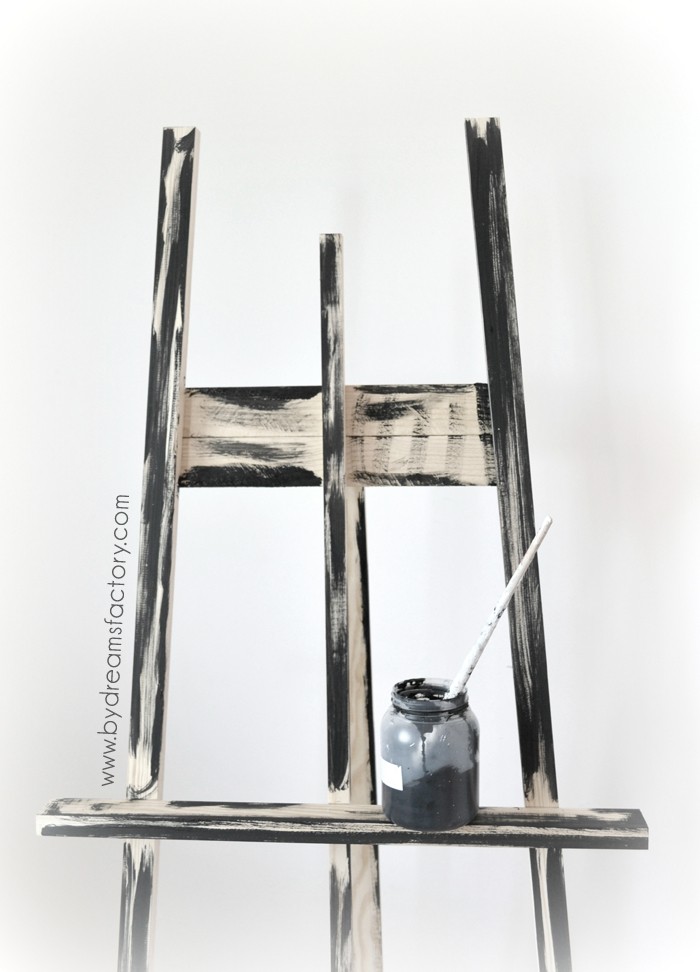
To give it that chippy and romantic Shabby Chic look I used my one and only method, the one I always use for our decorations: painting the surface with two contrasting colors, rubbing a little bit of candle wax on the edges and then distressing.
First I applied a dark water-based paint on all the edges, let it dry and then rubbed the edges with regular candle wax. This will help this first layer of paint to show through the final paint. It's a great method that you can use on all kind of surfaces, you can check my other DIY projects to see how I used this method on wood, glass, metal and even cardboard.
My choice for the second color was the amazing milk paint* from General Finishes (click to buy) in a beautiful Snow White, the one that I've received from the lovely people from General Finishes a while ago for testing. It is pretty amazing, I love that is waterbased, has a great coverage and doesn't have a bad odor so you can even use it indoors. I've also used this professional paint on this French table (that I now use as a working desk/photo background) and on some other projects that I really hope to show you real soon.

I applied two coats of white milk paint, let it dry and then used a 180 sandpaper grit and sanded the edges here and there, to give it a really nice Shabby Chic look. I instantly loved it! :)

You can choose black and white, like I did, or use your favorite two contrasting colors.

[ctt title="The easiest way to create a Shabby Chic effect with 2 contrasting colors and candle wax" tweet="The easiest way to create a Shabby Chic effect with 2 contrasting colors and candle wax - via @didreamsfactory http://www.bydreamsfactory.com/?p=15" coverup="9TdHQ"]
To give it a real and complete artistic look, I decided to even make some kind of a canvas. So I improvised. I Shabbyfied a large frame from Ikea, using the same painting method and also painted the back board that came with the frame (the one that usually goes behind the photos). It was a match made in Heaven! :)

Then I wanted to decorate that lovely painted board so it would look like a painting. And so I created a French collage with some of my favorites French images from The Graphics Fairy and an amazing Shabby Chic rose also from The Graphics Fairy. It looks like a Shabby French postcard from Paris and you can download it for free and use it on many beautiful projects.
LATER EDIT:
I'm starting a new and exciting collaboration with Karen / The Graphics Fairy and I'm gradually making some of my collages and printables available for FREE download on her website.
Click HERE to download the printable I made for this project.
You can use decals to transfer the image, you can find all about decals here or any other transfer method. And that's it! The most amazing Shabby Chic wooden easel, if you ask me :)
If you like this idea, share it with your friends and family, or save it on Pinterest for later, so you know exactly where to find it! :) Would love to hear your thoughts on this, so feel free to leave a comment below.

Don't forget to smile,
Diana
__________________________________________________
*This post contains affiliate links of products I love and recommend. See more of my favorites {HERE}.
__________________________________________________
Featured ♥

__________________________________________________
Heather Tracy
Dear Diana, this piece is so lovely...I'm taking some time today to savor your amazing projects. Thank you for creating this sweet easel, and for showing us how simple it is to make our own!
Pat
I need to get a new password
Diana / Dreams Factory
Hi, Pat!
If you mean the password to download the special gift for subscribers, please send me an email to diana@bydreamsfactory.com and I'll send you all the details by email.
Rupa
This is a lovely project! I have admired your shabby chic projects for a long time now. I finally created a small wooden display piece using your technique with black paint, candle wax, white paint and sanding it. I am pleased with my first attempt, thank you for the inspiration and the techniques shared. I love this graphic, I may buy waterslide decal to try it out. i look forward to more posts with you and Karen collaborating.
Diana / Dreams Factory
I'm so happy when someone decides to give my projects a try .. I can't even tell you! :)
Karen, she is truly an endless inspiration, she made all this possible through her amazing graphics.
I hope you try the decals, too, they are my favorite when it comes to quick, easy and clean (French) decorating.
Thanks for stopping by, Rupa, I really appreciate your comment!
JaneEllen
So glad you shared easel tutorial. Might just get hubs to make one. Thanks also for gorgeous French images. I printed it out on laminated white burlap and on white cardstock depending on what I decide to use it for. Was so glad to find laminated burlap in white and natural, also found light laminated canvas to print on. All these were at Walmart in craft section. So much can do, gives images special look on burlap. Only get 3 sheets in pkg. for $2.97. Will have great time deciding how to use them. Happy weekend
Diana / Dreams Factory
I'm happy you like it, Jane Ellen!
Thanks for stopping by and sharing all these great infos, I love people that find such unique ways of decorating!
Rossanne
so, is the graphic transferred on? or is it a decal?, or did you use modge podge?
still not sure how you got the graphic on
thanks
Diana / Dreams Factory
Rossanne, I used decals for this project, but you can also use Modge Podge (or any other medium transfer gel).
Have fun! :)