
Hello, creative friends! As promised, I'm back with a few ideas on how to use the DIY Spray Inks that I showed you how to make last time. These are just a few of my experiments, let's just call them ideas on how to get started and create the 'abstract' backgrounds of your dreams. Feel free to come up with other unique ways of using the spray inks, you know, do things your way, there are so many possibilities here! Just have fun and enjoy the process, the final results might take you by surprise!
Check how to make DIY Spray Inks in any color first, if you haven't already.
The general guiding line for using the DIY Spray Inks is: don't overthink this and just go with the flow! :) Clear your mind and let your creativity guide you, the best experiments are those that don't involve too much thinking. I know this might sound odd, but our mind can be our worst enemy sometimes and can limit our creative process. Maybe we are afraid of making mistakes or we are afraid of failure, maybe we have high expectations and we are looking for perfection (been there, done all that). Well, try to forget all that! Perfectly imperfect is what we are going for today, so maybe it would be best to let your heart dictate the terms of this whole new adventure!
 I would say there are two main ways of approaching this DIY Spray Inks experience:
1. start with blank paper and spray the inks to create piles of 'abstract' backgrounds, then decide what to do with them and how to include them in your creations
2. start with printed paper and spray the inks randomly, while also keeping the design in mind
How to use DIY Spray Inks on blank paper to create 'abstract' backgrounds
Let's start with the blank paper! For the sake of experimenting, I'm using a few different types of paper that I had around. I thought why not give them all a try, see how they perform. I started with regular paper, cardstock, sketching paper, watercolor paper and tracing paper, then I also included some dictionary pages into this whole spray inking scenario. I know a dictionary page is not exactly a blank paper, but I've decided to include it here in this section because you don't actually print the pages yourself. And you can use it as a background for other projects, so let's just pretend it perfectly fits in this category! :)

IMPORTANT: Make sure you place a plastic sheet, a silicone or a teflon mat on your table before actually beginning this experiment, things will get REALLY messy! :)
I placed some of the pieces of paper on the table and started spritzing here and there with my first color, yellow in this case. I usually love starting with the lighter color. You can see that right from the beginning, the paper will start to slightly curl.

Spray another color - I continued with blue.

Continue to gradually add other colors, until you are happy with how your 'abstract' backgrounds look! I misted some pink, turquoise and purple next. The drying time will differ depending on how absorbent and thick your paper is. You can use a hairdryer or a heat gun to speed up the process if you are in a hurry, but I usually just let everything air dry.
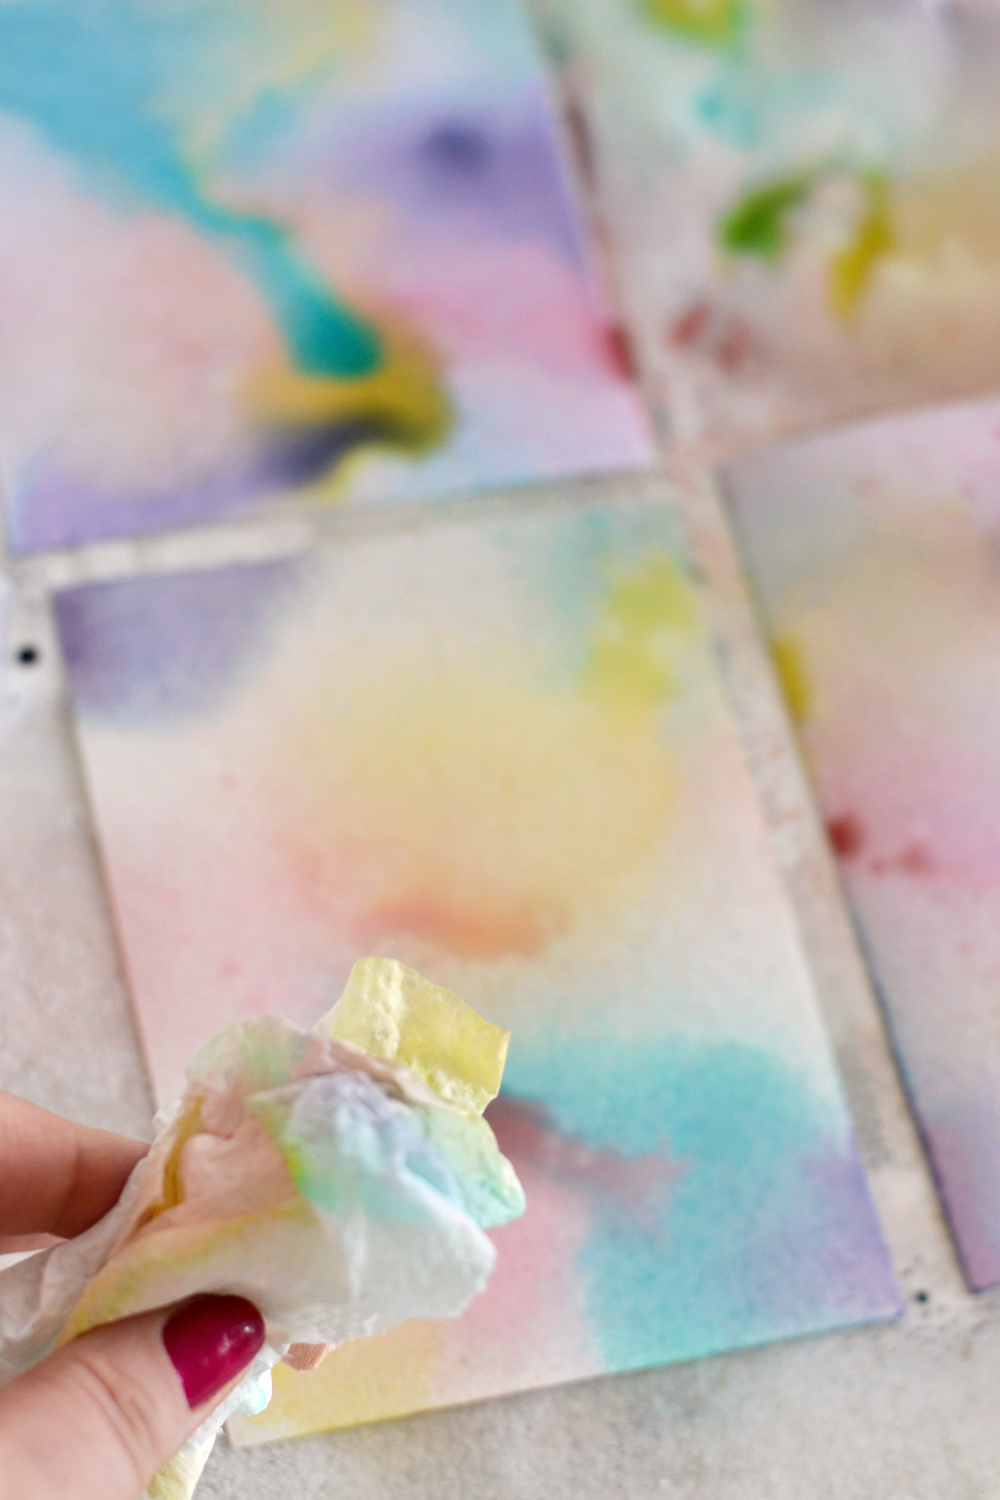
 It would be best to have a larger protected surface to work on, so you can do several backgrounds at a time. What I usually do is let the inks soak into the paper for 5-10 minutes, then I use a paper towel to pick up some of the excess ink (if there is too much). I don't press the paper towel on the background, I just lightly dab it on the surface and let it pick up the excess. I prefer this method because I've noticed that when I press too much and pick up too much color, that spot dries creating a cell, instead of a nicley flowing shape.
Then I gently take each abstract background and move it on another protected surface, but this time I place a few paper towels underneath.
This is how my dictionary page looked like while spraying it, you can see it got really warped in the process, making the colors to mix quite a lot. The spray ink colors look quite vivid at this point, but they will fade away after soaking into the paper and drying.

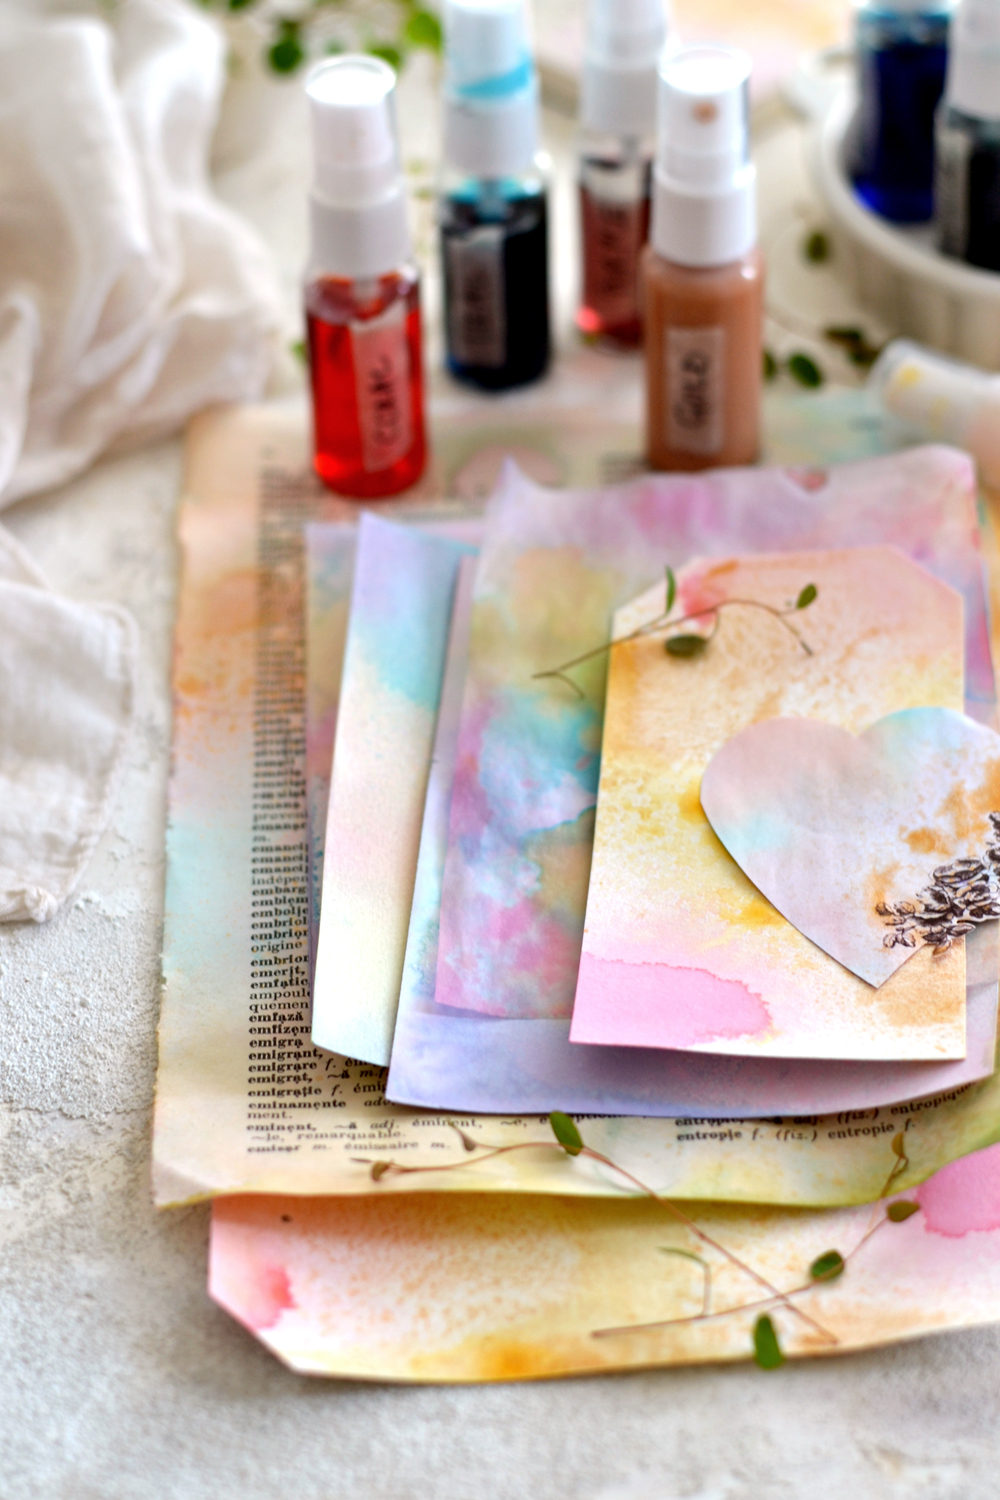
I mentioned while making the DIY Spray Inks and adding the dye that I went with a medium intensity in color, your final results might be less or more vibrant, depending on the intensity of your inks! Here you can see the final dictionary page and the tracing paper, along with a small heart tag after drying.
Remember how I mentioned before that lifting too much of the ink with a paper towel might create a cell, instead of a more organic, naturally flowing effect? If you look at the top of the page (on the right side of the coral spray ink - the image below) you will see one of those cells! That means I pickup up a little bit too much paint from there. So this was an unintentionally created cell and serves just to give you an example, but keep in mind that you can actually create one on purpose if you want to get a similar cell effect.

And don't forget about adding some gold spray! I love spritzing the gold here and there, after I finish adding all the colors and while the paper is still wet. A touch of gold is one of my favorite things to add to my projects, because you get different effects, depending on the lighting.
 For me personally gold on paper is like a small surprise - it looks almost like a regular orange-yellowish color while you place it in front of you, but it creates stunning metallic shimmers when you tilt the paper into the light. It's a nice touch to add to gift tags or any other paper creations!
 Here are all the papers that we started with, now turned into stunning backgrounds! I LOVE how they all turned out! The all-media cardstock and the regular paper are my favorites! The watercolor paper and the sketching paper have a more prominent texture, which can be a plus if you need to add texture to your projects. The tracing paper warped the most but created some truly interesting final effects.
You can place the warped background between the pages of a book or you can even iron them (placed between two sheets of parchment paper) if you want to flatten them again.
 And speaking of tracing paper, here is another example, with a different brand of tracing paper. I guess it really depends on the paper, here I was able to create these super large cells, even without pickup up any of the color! I just let the paper air dry, as you can see the absorption was quite different than any of those other papers.
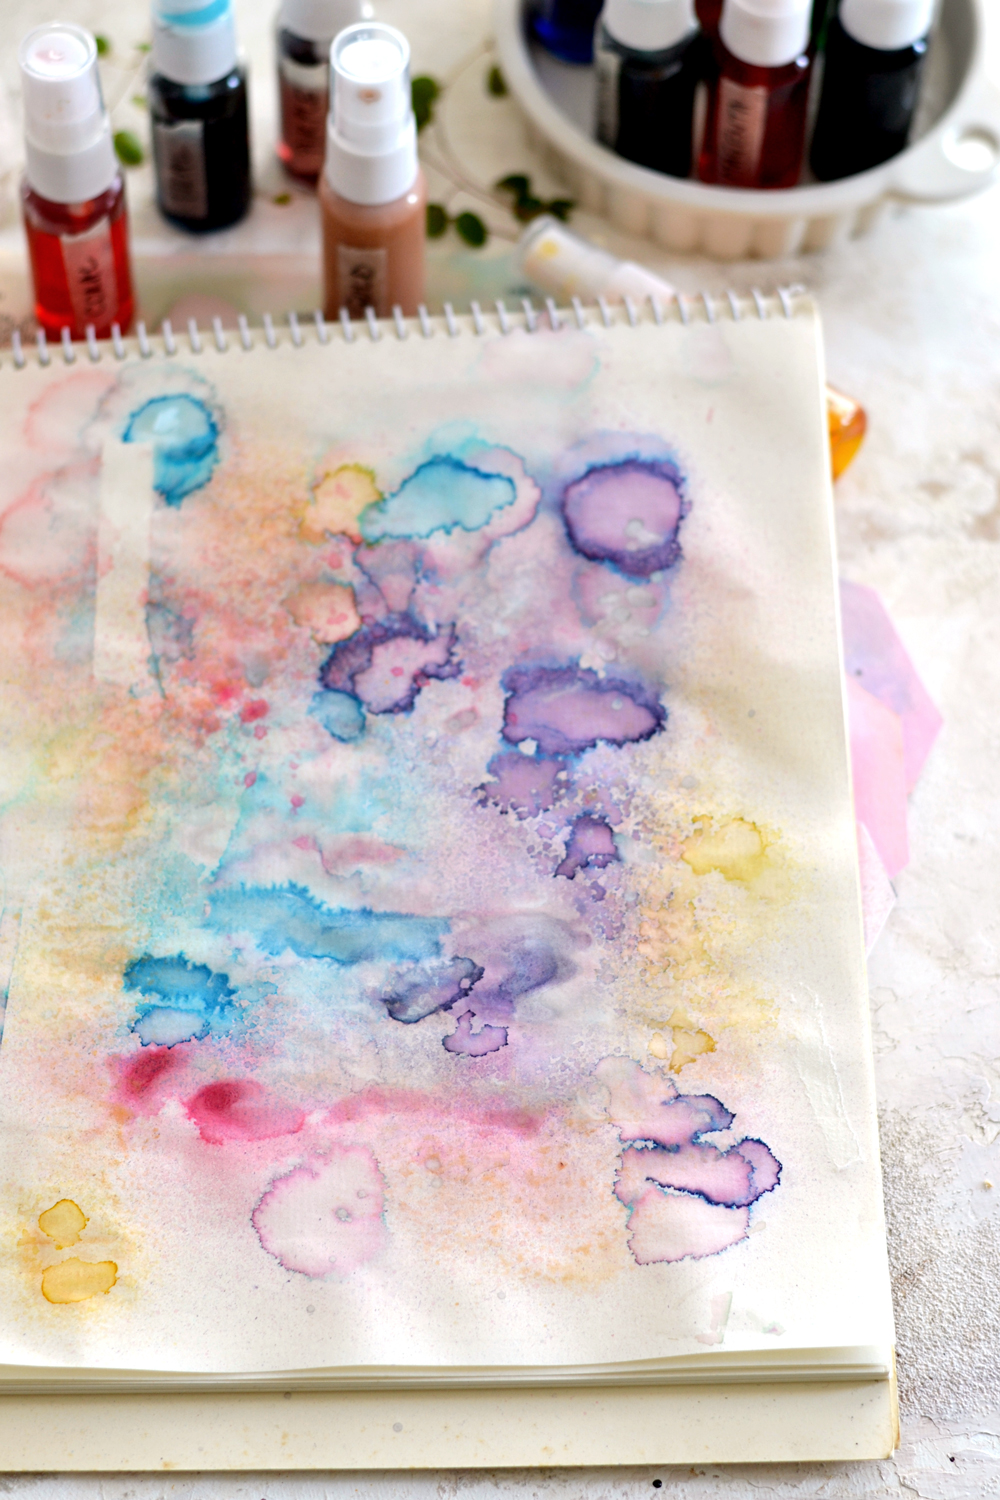
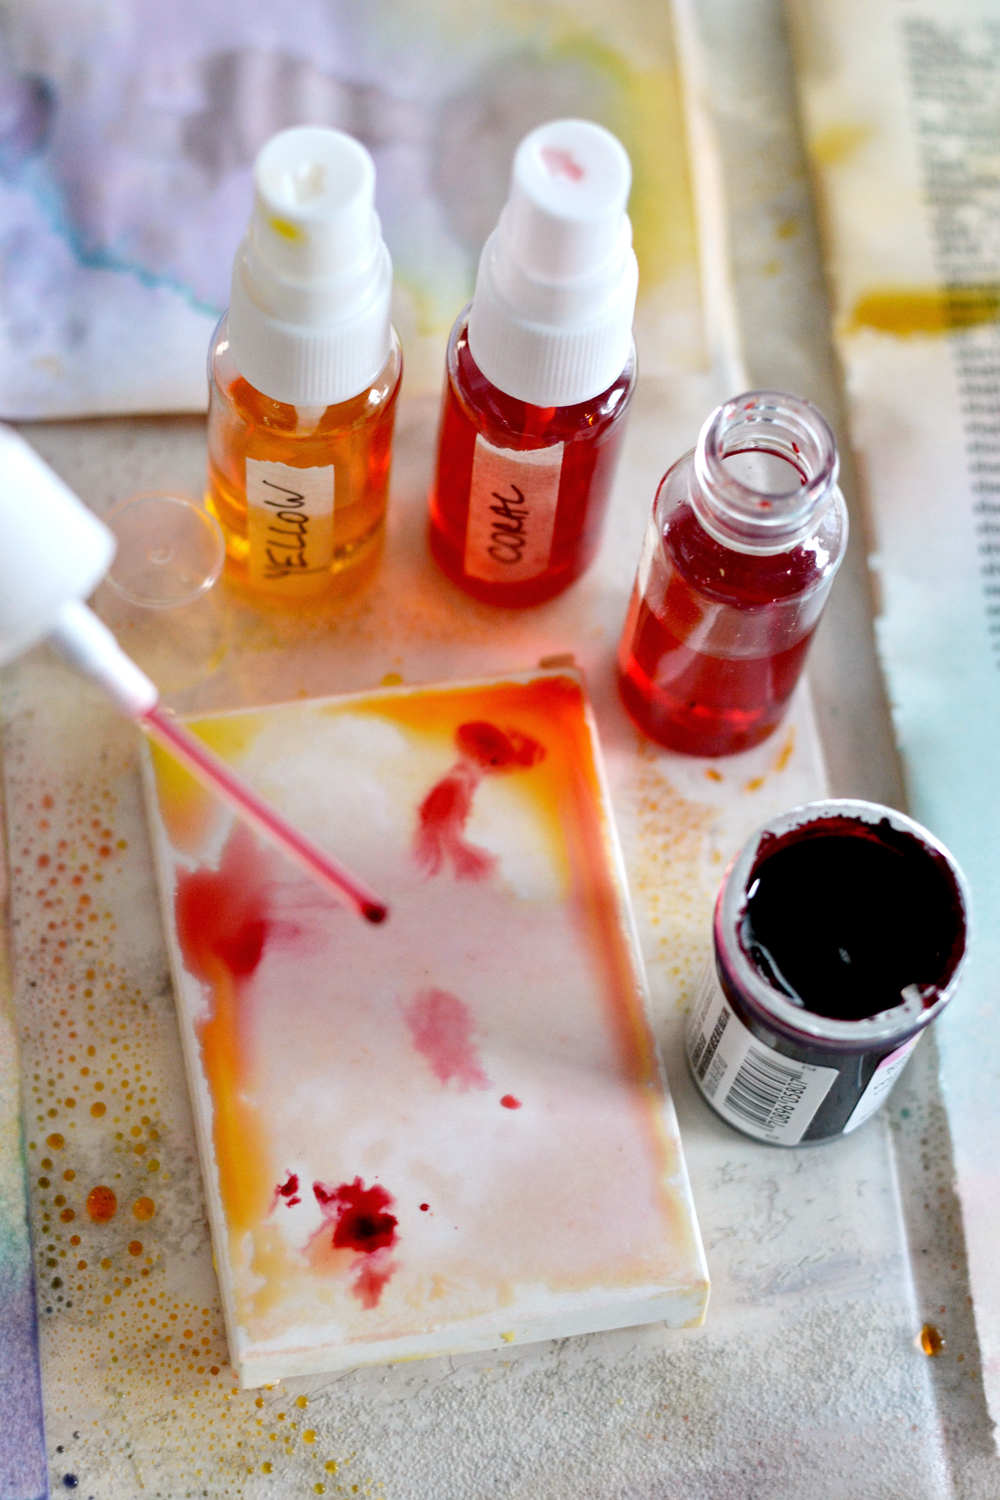
You can really spray anything made out of paper with this homemade ink, even a small (or a large, why not?) white cardboard box. If you want to highlight some areas even more, you can take the top of your spray ink bottle off and use the tube as a brush to pick some color and 'brush' it on the paper. You can add even some undiluted color this way, straight from the food coloring bottle, and just let it playfully mingle with all the other colors on the paper.
Going in with lots of colors or just picking one or two can be a personal choice. Here I used my yellow, orange and pink DIY spray inks to turn these blank tags into gorgeously stained abstract beauties! These 3 colors are actually my all-time favorites, I usually pick them up and use them the most! I also added a sheer mist of gold! The pigment in the gold sometimes creates some sort of a fine granulation on the paper, which can add more texture and bring more interest to the final project.
RELATED POST: DIY Large Gift Tags - free printable

I mentioned earlier that I use paper towels to sometimes pick up some of the color and to place underneath the backgrounds while they are air drying. Well, those paper towels can also be used as backgrounds afterward! Mine looked a little bit too flower-power for my taste, but I'm keeping them in my stash of backgrounds nonetheless. Maybe I'll need them for some hippie-inspired projects from the '70, who knows?! :)

How to use your new DIY Spray Inks 'abstract' backgrounds
Have your new abstract backgrounds close by for whenever creativity strikes! It's always great to have these gorgeous beauties around, especially if you, like me, are sometimes intimidated by a blank page and don't know how to start. These backgrounds will give you a colorful base to start with, it's so much easier to get creative this way!
You can easily use some stamps to make an amazing tag for your art or junk journal. Not to mention that one of these beauties can become a lifesaver when you need to quickly embellish a gift!

The backgrounds can be used as a colorful base for any other DIY paper project that you can image! Now I'm thinking some 'abstract' stickers will look amazing too!
What else can you stain with these DIY Spray Inks?
The short answer? Anything that you want! ;) Even gauze or fabric, the sky is the limit! Just keep in mind that even though the stain on the fabric won't be waterproof, they will still look amazing if included or added as embellishments to other projects too!

How to use DIY Spray Inks on printed paper
To use the DIY Spray Inks on printed paper, you'll need to print the paper first. Obviously! :) Really important - you'll need to use a laserjet printer for this to work, an inkjet printer will not do!
You can use black and white or colorful designs to start with, then choose your spray inks according to your inspiration at that moment. If you are starting with colorful printables it would be best to choose colors matching the same color scheme. I usually try not to overcrowd things with too many colors, the background should enhance the design, not overpower it. I usually start with the color / colors that I want in the middle, then I spray on the edges a little bit of brown spray ink. Adding the brown will not only create that lovely' vignette' effect around the edges, but will also imprint a chic and subtle vintage vibe to the whole project.
I'm including links to a few of the projects where I've used the sprays to stain the paper after printing it, you can click on the images if you want to check the step-by-step tutorials and download the free printables.


pocket binders or a clear silicon mat or a teflon mat to protect your working surface
laserjet printer
regular paper | cardstock paper (love the Seawhite of Brighton all media cardstock)
watercolor paper | sketching paper | tracing paper
paper towels | scissors
vase flower stamp | script stamp | lace stamp
PIN FOR LATER & SHARE ♥

I LOVE it when an abstract background is not too vibrant but is still powerful enough to tell a story. Your own creative story! ;)
Hope you'll find today's post inspiring and you'll decide to try it on your own! If you have any questions, feel free to leave them below!
Don’t forget to smile,
Diana
~~~~~~~~~~~~~~~~~~~~~~~~~~~~ This post contains affiliate links so you can easily find the products I love.
See more of my favorites {HERE}.
You can also check my Amazon front shop –>click here
for more DIY, home decor & kitchen essentials, healthy stuff and more shopping ideas.
Lisa B.
Thank you so much for sharing this idea. I love it. You are so kind also to include some free downloads.
Lisa
Diana | Dreams Factory
Happy you like the free downloads, Lisa!
Hope you'll have fun using them!